kristiecakes

A blog about cakes, cupcakes and other sweet + savory confectionery goodies.

Wednesday, February 12, 2014

How to...Make "Strawberry" Cake Bites

 I don't really know if anyone else really ever has this problem, but I have a plethora of cake (**usually red velvet and I have no idea why it's my number one ordered cake type), and I feel sad letting it sit there. Today I spent a good 5 hours catching up on work (cake life isn't full time..yet !) that I've been neglecting, so naturally I am inclined to de-stress through a creative outlet. Since Valentine's Day is fast approaching, I thought I'd try to experiment and create cute "Strawberries" out of cake. These are perfect, thoughtful gifts for all those special someones in your life :)
 
 So first I started off with my cake in a container and added a tablespoon of cream cheese frosting.


 Start by mixing your cake + icing with a knife, to break up the cake. Mix until the cake+ icing mixture is malleable enough to shape without falling apart (depending on the amount of cake you are working with, you may need to add more frosting). To test this, simply grab some cake and see if you can create a ball. If you can, no additional frosting is necessary.


 Next start creating your "strawberries" out of your cake. I started by rolling into balls, then shaping the tips into a point to resemble a strawberry shape.  Strawberries aren't all perfectly shaped the same so don't worry about making them identical. After shaping, put them in the fridge for about 20 minutes to set.


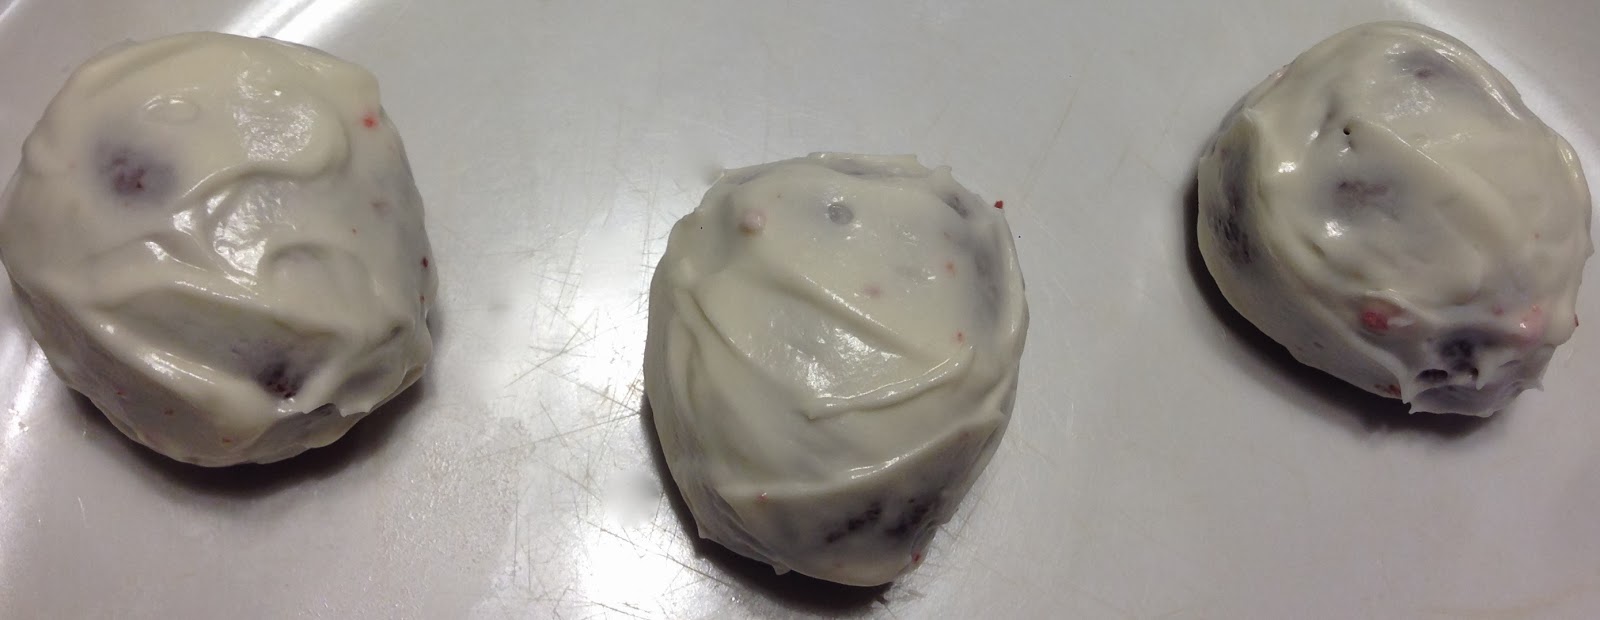
 After set frost "strawberries" (sans the side that it is sitting on), and leave in fridge to set for another 20 minutes.


 While "strawberries" are setting in the fridge, roll out your red fondant as thin as possible. It is just gonna be used to cover the outside to give the appearance of the "red" color. Also get your green ready, we will be using it for the "leaves" of the strawberries.


 After 20 minutes, take out "strawberries" and smooth out the frosting as much as possible. Cut the red fondant into squares big enough to cover each "strawberry" individually. Place red fondant over the "strawberry" and smooth out the sides. Tip: its better to cut a bigger piece of fondant to cover and trim edges, then to cut too little, especially since fondant is very thin. You want to prevent tearing and have enough fondant to work with.


Trim excess fondant.


Next we will be working on the detail work, starting with the strawberry leaves. Roll out your green fondant to be about 1/2 cm thick. Using a star cookie cutter,  cut out enough "leaves" for all the strawberries you've made. Adhere them to the strawberry with a little water.


The final details will be the strawberry "seeds" and strawberry stem hole on the top. Using a tooth pick make little lines all around the "strawberry," they don't need to be evenly spaced, just eyeball it. See examples below if you need a picture reference.


 Congratulations, you've officially made the cutest strawberry cake bites ! Enjoy !


-Kristie


Monday, February 10, 2014

How to... Make a Spam Musubi cake

Alright, if you're not from Hawaii and you're reading this, SPAM IS AWESOME. Especially when paired with rice and nori (seaweed) to make a spam musubi. It's the perfect on-the-go snack or meal and often referred to as the "Hawaiian" energy bar. I'm a huge fan of re-creating foods I love into cakes, just for shits and giggles. It came at a perfect time because it happened to be one of my friend's fabulous 40th birthday, and I wanted to make her something unique.

So what you'll need for this cake:
-fondant: white, black, pink (you can buy fondant from your local walmart, or online)
-rolling pin
-a cakeboard to build your cake on
-cake and frosting of your choice
-sharp knife for cutting

 As always, start off by baking your cake as directed by your recipe and prep your frosting as well. I had some left over red velvet batter, so I used that, along with my never ending supply of cream cheese frosting! I baked mine in a 8x8 pan because I didn't have that much batter, and I am creating a spam musubi "to size," so a large pan was not necessary. Leave cake on the side to cool completely. While you're doing this, you can get started on making your fondant rice, if you need picture references, refer to my sushi cake post for more details!

 After your cake is completely cooled, start by cutting your cake into a small rectangle resembling the rice portion of musubi.

 Next, start by icing your entire cake and leaving it to set in the fridge for about 20-30 minutes.

 While the cake is cooling, roll out your white fondant to about 1/2 cm thick and set on side. Also start mixing your pink and white to make "spam colored" fondant. I started with white fondant and slowly added pink until I was satisfied with the color. Finally roll out your black fondant to create the nori, I always work with black last to ensure it doesn't get mixed in with any of the other lighter colored fondant.

 Take your cake on the fridge, and use your white rolled out fondant to cover the entire cake. I start with the biggest section in the middle, then smooth out all sides.

After all sides are secured nicely to the cake, trim excess edges with a knife. Don't worry if it's not perfectly smooth, luckily the fondant rice details will cover all of this :).

 Our next step is working with the "spam" colored fondant to create the "spam" slice. I rolled the "spam" out to about 1 cm thick. After doing so I cut the spam to have rounded corners and straight sides. Next, using a little water on the "spam" slice, place it over the fondant covered cake.


 Next we will be adding the "nori" element, which is your black fondant. Using your rolled out black fondant, cut a inch wide rectangle, long enough to go around the "musubi." The cake will have condensation due to being in the fridge, so no additional adhering water is necessary to secure the nori to the cake. Place nori around the middle of the "musubi" and trim excess edges.

 Last, but certainly not least, the most important detail to add, the fondant rice! Using a brush, lightly brush all white areas with water and place fondant rice on cake. It doesn't need to be uniformed because a real musubi's rice is all over the place.


Now that the rice is in place, step back and admire your handy work ;). If you have any questions, comments, or even requests for certain cakes please feel free to email me: Kristiesagara@gmail.com.


Thanks for all the support! kristiecakes will have some exciting news coming this March, so stay tuned! :D

-kristie


Friday, February 7, 2014

How to... Make a "Shave Ice" cake

 I got the cutest order from Mari for a shave ice cake for her friend's birthday. She wanted red velvet + cream cheese and the "flavors" to be the OG (original gangsta) of red, yellow, blue. If you don't know what shave ice is, it is literally shaving ice into a fine "snow-like" texture, and then pouring your choice of syrup over it. It's a snack Hawaii is known for and always good for any hot day.

What you'll need:
-A bowl (to act as the "shave ice" bowl you will be building your cake in) **I bought mine from safeway, just basic blue bowl
 -Cake of your choice
-Serrated knife
-Frosting
-Sprinkles (Red, yellow, blue ...or whatever color choices you decide on) **these can be bought at any local grocery store or Walmart
-Straw
-Wooden Spoon (optional)

So as always the first step is baking your cake and preparing your frosting. Bake your cake as directed and leave to cool. I baked the cake in a 9 x 13 pan just in case I needed extra cake for any mistakes, hehe.

After allowing cake to completely cool, start by grabbing the bowl you bought to build your cake in. Use the bottom of the bowl as a stencil to cut out a circle that fits into the bowl as a base perfectly.
 Next, grab your icing and start covering the entire first layer of cake in preparation for the next layer.
For the next step, grab another bowl and use the top, widest portion of it as a stencil for the next 2 layers. So you should end up with 2 cake circles. Don't worry if the circles are not exactly identical, you will be cutting them down anyway. Place the first layer on top of the layer you just iced and trim to fit bowl. After trimmed, ice just the top of that layer.
 Use your 2nd circle cake cut out from the previous step, and place it on top of the iced layer. This will be your final layer for the cake. Taking a serrated knife round corners to give it a "shave ice" mound kind of look.
Finally, grab your icing and ice the rest of the cake. I suggest icing in one direction in a circular motion. The cake does not necessarily need to be "perfectly smooth," because we are imitating ice, but be sure to try to make all sides look symmetrical.
Finally grab your sprinkles and with each color, sprinkle in sections as if to imitate the flavors of the "shave ice." See below for a better description. Make sure to cover as much of the frosting as possible, its best to sprinkle over a pan or plate, one color at a time so you can make use of the sprinkles that fell.
Finally put in your wooden spoon and straw to complete the "look," to give your "Shave Ice" cake more realistic details! Easy right?!


Have fun!
-Kristie


Tuesday, February 4, 2014

How to... Make a "Pizza Slice" cake

 Okay, let's be serious, WHO DOESN'T LOVE PIZZA!?! It is my ultimate comfort food, and it's perfect for breakfast, lunch and dinner. It's also the easiest little thing to make when you have a little bit of leftover cake batter or cake. AND it's so cute!

First start of with baking your cake, I started with an 8 x 8 pan of red velvet batter (that's all the batter I had left. lol). Then as always, let it cool completely before starting to build.


After completely cooling start by cutting your cake into a pizza shape (triangle + rectange).  I cut the crust separate from the pizza so I can build the crust a little higher.


After cutting the cake, start using your frosting of your choice to ice your cake all around and put it in the refrigerator to set for about 30 minutes. 


 After setting for 30 minutes take it out of the refrigerator and start by rolling out your pizza colors: Brown, Yellow,  and Red. Roll out your fondant to about less than 1/2 cm and set aside until ready to use.

When all rolled out, start with the brown fondant to create the crust. I cut a straight line to create the crust edge, then place over and smooth the edges to the cake. Trim excess fondant and remove. Repeat for "sauce," and "cheese."


After that put the "sauce," the red fondant, to create the look of pizza sauce under the cheese. Smooth the fondant to the cake then like before trim the edges.

Finally put the "cheese," yellow fondant, then create little pepperonis out of the red. To make the "pepperoni's" roll the balls into little circles and flatten with your thumbs to desired width. Use a little water to adhere the "pepperoni's" to the cake. VOILA!  "Pizza Slice" cake. Enjoy


-Kristie


Saturday, February 1, 2014

How to... Make "Ice Cream" cone cupcakes

 These are probably one of the EASIEST cupcakes you'll ever make and they're kid friendly!

Materials you will need:
-ice cream cones (flat bottom ones)
-the cake batter of your choice (I made red velvet for the order I had)
-frosting (I used cream cheese frosting)
-sprinkles
-a decorating bag. If you don't have a decorating bag you can also use a ziplock bag.

 The first step is to make your cake batter, and prepare your frosting. After doing so get your cupcake tin and but a piece of foil over the pan to cover it. Poke a hole into each cupcake hole with a chopstick (or pen). Then using your finger, make the hole just big enough to fit your ice cream cones in each individual cupcake tin. This will help your cones have extra support while baking in the oven and ensure they won't fall over.

 Fill your ice cream cones up until its just about 1/2 cm below the edge of the cupcake.


 Bake cupcakes as directed by your desired recipe and set them on the side to cool.

If you have a piping bag (decorating bag), fill the bag up about 1/2 way with the frosting you want to use. If no piping bag grab a ziplock bag, fill it about 1/2 way as well and cut the tip of the bag about  As soon as the cupcakes are completely cooled, pipe frosting on in a tiny swirl. **Be sure not to get it on the edges, the frosting can sometimes be too heavy and will sag. Decorate with sprinkles as you wish and you've made your very own "Ice cream" cupcake!


Enjoy :)
-Kristie